
Lab 3-3 installing a processor and connecting power – Embark on a journey of precision and efficiency with lab 3-3: Installing a Processor and Connecting Power. This comprehensive guide unveils the intricacies of handling delicate components, ensuring a seamless and stable system.
As you delve into the world of computer hardware, this tutorial will equip you with the knowledge and techniques to navigate the installation process with confidence. From aligning the processor with surgical precision to connecting power connectors securely, every step is meticulously Artikeld to empower you with the skills of a seasoned technician.
Installing a Processor
A processor, also known as a central processing unit (CPU), is the brain of a computer system. It is responsible for executing instructions and managing the overall operation of the computer. Installing a processor is a crucial step in building or upgrading a computer, and it requires careful attention to detail to ensure proper functioning.
Aligning the Processor
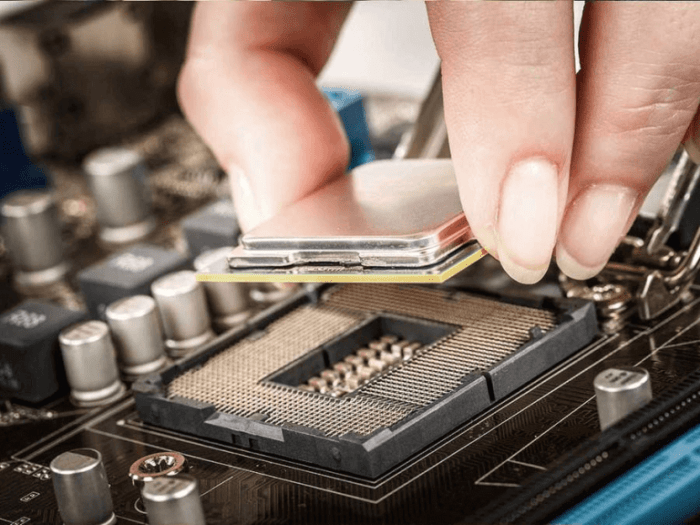
Before inserting the processor into the motherboard, it is essential to align it correctly. Most processors have a small triangle or notch on one corner, which must be aligned with the corresponding mark on the motherboard socket. This alignment ensures that the processor is properly seated and makes electrical contact with the motherboard.
Inserting the Processor
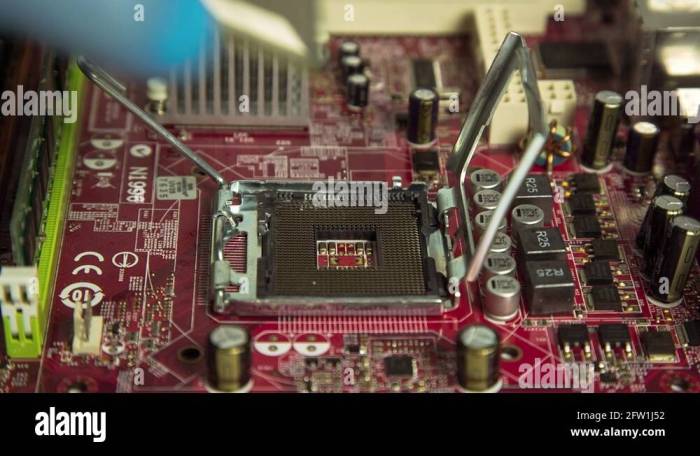
- Open the lever or latch on the processor socket.
- Carefully align the processor with the socket and gently lower it into place.
- Close the lever or latch to secure the processor.
Handling the Processor
- Always handle the processor by its edges to avoid touching the sensitive pins.
- Do not apply excessive force when inserting the processor.
- If the processor does not fit easily into the socket, check the alignment and try again.
Connecting Power

Connecting power to the motherboard and other components is essential to ensure a stable and reliable power supply. There are different types of power connectors, each with a specific function:
Power Supply Unit (PSU) Connector
The PSU connector is the main power connector that supplies power to the motherboard and other components. It is typically a 24-pin connector that plugs into the motherboard’s power supply unit (PSU) header.
CPU Power Connector, Lab 3-3 installing a processor and connecting power
The CPU power connector supplies power to the processor. It is typically an 8-pin or 4+4-pin connector that plugs into the motherboard’s CPU power header.
Other Power Connectors
There may be additional power connectors for other components, such as graphics cards or storage devices. These connectors vary depending on the component and motherboard.
Connecting the Power Connectors
- Align the power connector with the corresponding header on the motherboard.
- Push down firmly until the connector clicks into place.
- Ensure that all power connectors are securely connected.
Troubleshooting: Lab 3-3 Installing A Processor And Connecting Power
If you encounter any issues during processor installation or power connection, follow these troubleshooting steps:
Processor Installation Issues
- Check if the processor is properly aligned and seated in the socket.
- Inspect the processor pins for any damage or bent pins.
- Try reseating the processor by removing it and reinserting it.
Power Connection Issues
- Verify that all power connectors are securely connected to the motherboard and components.
- Check if the power supply is turned on and providing power.
- Try using a different power supply or power cord.
Safety Precautions
When working with electrical components, it is crucial to follow safety precautions to avoid potential hazards:
- Always unplug the computer and power supply before handling any components.
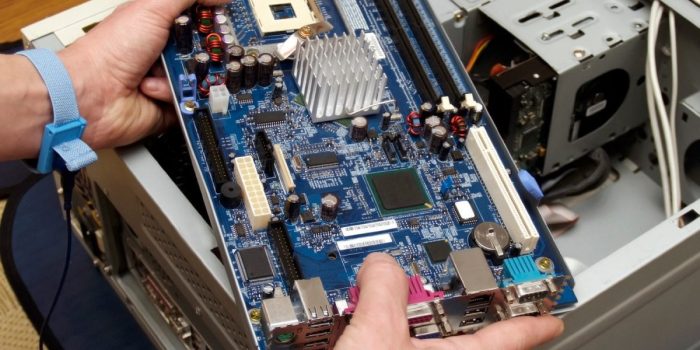
- Wear an anti-static wrist strap to prevent electrostatic discharge (ESD).
- Do not touch the exposed pins on the processor or motherboard.
- Handle components with care to avoid damage.
Tools and Materials
| Tool/Material | Description |
|---|---|
| Phillips screwdriver | For securing the processor and motherboard |
| Anti-static wrist strap | To prevent electrostatic discharge |
| Thermal paste | To improve heat transfer between the processor and heatsink |
| Soft-bristled brush | To remove dust and debris |
Question & Answer Hub
What are the common mistakes to avoid when installing a processor?
Mishandling the processor, incorrect alignment, and improper insertion can lead to damage. Always refer to the manufacturer’s instructions and handle the processor with care.
How can I ensure a secure power connection?
Inspect the connectors for any damage or debris. Align the connectors properly and apply firm pressure until they click into place. Loose connections can cause system instability or damage.
What troubleshooting steps can I take if my system fails to power on?
Verify that the power supply is functioning correctly. Inspect the power cables for any damage or loose connections. Reset the CMOS by removing the battery for a few minutes. If the issue persists, seek professional assistance.
